Saturday, May 28, 2016

Custom Flex-struder for wheels and assembly

Printing Flexible Material
Has been the holy grail for many printer owners... most printers come with their own custom MK7 or 8 branded partial extruder assemblies.  These kits generally have the heat throat that goes from under the extruder frame into the heating block and nozzle.

These extruders are common in most printers... below is a typical MK8 extruder...
I have these connected to universal mounts that allow me to add/remove them from the 2 large CNC printers I have.

Neither print flexible materials... they get jammed or never extrude correctly.  Plus neither printer has a heated bed.

Until...

I developed the perfect extruder that I will be packaging and possibly selling on Amazon shortly.

The good news:
  • Its a modified MK8 extruder - thus it fits into 90% of the printers out there.
  • It can be easily assembled - it has 2 modifications outside the typical MK8
  • It is low cost - it is made using existing MK8 parts.

Here are the items I generated:

Extruder Base has a deep enough ridge to catch the flex material and keep it snug while it makes its way into the throat assembly.  No clogging.


The extruder tension arm is based off the typical HicTOP model extruder arm


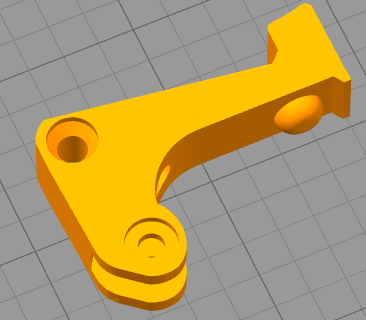
When combined with the typical bearing for pressing against the motor gear, these make a very tight and compressed path that works perfect for the flexible filaments.

Lastly we need the special bottom block used with the HicTop or other extruders that use partial plastic pieces.


With the assembly together using the existing cooling fins, fan and metal protective cage.  The unit simply sits back in the printer as the old MK8 did.

Printing flexible items as we speak...


Sunday, May 8, 2016

Lens for Radar Eye Installation

After the print finished, the radar pieces looked great.  The actual images I have seen show the internal parts a little more extruded from the frame or back plate but this will suffice.

I am going to stick with the 70mm sphere since I need to simply shave down the outer edges to "shrink" the diameter of the sphere.

Taking a belt sander, I simply ran the sphere on it several times each time breaking off the molten/hardened plastic formed from it... slowly it shrunk the diameter of the sphere.  I then checked it against the template band that was printed out and it was real close.

Time for the fitting

Placed the lens into the pocket and pushed it into the other side, slightly bending it to get inside the plastic.

Presto!

Works!


Saturday, May 7, 2016

Dome Assembly Part 2

Printing Redux


We had a few issues with finding the correct diameter as well as look for the dome's Radar Eye pieces.

  • My first order was for 70mm sphere (christmas ornament) this was too small
  • My Second order was for 80mm sphere (another christmas ornament) this seem too big as well as I didnt realize it had gold glitter on it...!


So...

I am trying to find a sphere that will fit within the radar eye pieces and look correct.

Radar eye re-print

I had to reprint the radar eye pieces, previously I had printed the internal parts and the outer lens but not the backing... so this time I combined the internal pieces and backings to form 1 single unit.

I combined the 2 and made 1 piece to print.


This will take 4 hours to print... at High resolution .1mm layers.