Sunday, October 23, 2016

Sounds and lights

Purchased the necessary parts to build the disco-droid controller which Jim Harvey Yu has released to the general public on behalf of the BB8 builders club.

The device is basically 2 ICs similar to the ole TeeCees light kits for R2, an Arduino nano or blu nano (Bluetooth onboard) as well as various resistors and such.

There is a DF MP3 player and a micro SD card reader...

You will need 2 TLC5940NT ICs (I bought them in bulk)

Purchase the premade boards from OSHPARK https://oshpark.com/shared_projects/lTh7FzFx


Various size DIP sockets (need 28pin)

Purchase an additional Bluetooth 4.0 unit for connection from the main Arduino Mega

Purchased Arduino Blu nano unit (nano with built in Bluetooth)

purchased a lot of DF MP3 units with built in SD slots.

Soldering the 2K resistors

Flip it over and cut off the excess...

Completed soldering the 10k resistors...

Placed the DIP sockets on and soldered into place

Inserted the ICs into their respective slots... facing keys towards the SD player.

Dome re-print (weight needs to be lessoned)

Working with Patrick Stefanski - much progress and insight to his challenges and skills at creating 3D items has been a great blessing on this long journey.

He found as I am, that the dome head is too heavy when using the original club spec dome pieces... much work is needed to decrease this and Patrick set out to cut out as much material as possible.

First the dome...

Using his tools he re-create a lighter version of the dome sides and embedded a center support for the magnet assembly for controlling the spin and movements.

Here are some CAD STL views of the work...  I started printing the first half (he did in 1/2 sections and full) as my CNC can easily print the entire piece (24" x 24") bed... I was nervous about the length of each print being 33hours+  so resolved to 20+ hours.


Notice the center support conduit... this is where the magnet holder will be attached via a 6m bolt that is roughly 4" long.


Here is another view of the front assembly.... it looks like the club dome but lighter.
Note.. the skirt assembly however is 1 piece now and hollow so the weight is significantly reduced.
After inserting the disco droid electronics, I believe we will have the weight down to 5lbs.

Here is a quick video of the re-print nearing the end... the total time for the front 1 of 2 was roughly 26hours and it had 3 parameters so I can smooth it out quite a bit.


The final product looks great... some minor sanding will need to be done alone with primering it to death....   the bad news is the weather is not on my side.


Work on assembly, skins and more

My father Andrew Cross, helped rip apart the "broken" motor from the gyro swing... and found that the connections are made via a spring loaded connection that appears to have solidified when I had used the motor as a "fuse" previously during the build.


I swapped the low speed spring out and sure enough we are back in progress!  re-assembling the cheese and components once again... so we can work on the skins.

Using a 11" aka 280mm globe, we are tracing out the circle panels.  Need to ensure we are full circle and not an eclipse and use the top most part of the new molded material for roundness.  I found it easier to place the molded material back on the hemisphere and draw the circle on it tracing the globe.


I estimated it was roughly 1.75" between the outer circle and the inner circle and found an object closely matching that inside circle size... barrowed it from the kitchen...

Started to make a few templates for the designs around the circles
The issues will be how to make perfect straight lines when I am doing this by hand...


I purchased engraving kit for clay and used one of the flat utensils to push and gouge out the lines so its more like the model... if you look close you can see my lines indented...


Friday, October 21, 2016

Making the skins begins

After completing the box, we used Elmer's spray on glue and sprayed the inside of the box and pasted down tinfoil which will enhance and increase the heating from the quartz heater in the belly.

pasted down the first strip of tinfoil... so far so good


here is the hemisphere which will be used when I press the softened PVC against it

Here is the completed box... ready to go

Putting it all together


Sunday, October 16, 2016

Building the heat box for forming the skins: Part 1

The heat box is needed to essentially soften the PVC foam board which will then be pushed over a 500mm hemisphere to shape the pieces as a skin for BB8.

The Skin pieces...


There will be 14 pieces that will need to be softened and formed this way, with 6 of them becoming circle (ring) panels and the other 8 becoming triangle pieces between each.

The design of the BB8 unit skin looks like this:


The skins will be 2mm in thickness and will cover the cheese + sides of the chassis.

This is yet another item that I have never done... so this will be both exciting and nerve racking to say the least.

First the box... why?


We need to soften the plastic pvc so we can shape it over objects... we can also build out a vacuum forming kit that once the pvc is soft, placing it over a vacuum bed will shrink fit tight objects to replicate them using the PVC molding.

How do we build it?


We purchase a Quartz heater (shop or garage heater) that basically heats by direct versus heating up the air...

This unit will be placed in the belly of the box, it is roughly 12" x 20" in size...

The box will be roughly 30" high and tapered at the top... meaning the sides will go from 12" to 22" forming a somewhat angular rectangle.

This allows the top to be 22"x22" while the bottom sits tight around the heater.

Here are some photos of the build so far...

Using 1x2" studs will screw the sides together using sheet metal 3/4" screws,,,

Closeup of the 1x2" stud against the two sides...

You can see the angle from the narrow lower portion forming to a more square upper portion.

Another view of the studs alignment.

Test placed the heater at the bottom - perfect fit!


Looks like we are ready for the next piece...
Tin foil the insides :)

Friday, October 14, 2016

Replacement ordered and printing begins once again

Ordered the replacement Vauxhall windshield motor and while I wait for that thing to arrive (Oct 20th) I will begin printing out new parts based off of Patrick Stefanski's dome design and gimble magnet assembly (to lower the weight).


Here is a photo of the weight so far with his mounts to the wheels and lower skirt assembly...  he has graciously given me his STL files to begin printing.


here is a video he shared with me... this guy does awesome videos... I encourage him to have a running weekly video blog on our builds.


Blowing the dust off the CNC and getting the extruders all ready to begin printing...


Wednesday, October 12, 2016

Electronics Breakdown Supply list

For those who have asked.... here is a growing list of electronics and sources on where to get the items being used in this particular build. 

Many of these mimic James Bruton while others are alternatives to his build with compatible parts (luggage wheels).

This list will be continually updated... will add in screws and such as I ended up using wood screws instead of the 4x40 for everything...


Quantity
Hardware Name/Description
Where can I get this?
1
Arduino Mega ADK – used for main CPU
3
BTS7960b 43a Motor Driver
(motor controllers for main and gyro)
1
Bluetooth dongle Class 1 version 4.0
OPT
Without Arduino Mega ADK
(standard need USB shield)
4
Xv to 5v regulators
(servo adapters)
1
POT (potentiometer)
(Gimble swing detect)
1
HS-1425CR Hitec Servo (continuous rotation)
(Gimble spin)
2
UXCell Motors 300RPM DC 12V 0.03A High Torque
(Gyro Spin)
3
On/Off Rocker switches
5
Luggage Wheels (same size as the printed)
1
MPU Gyro 6 axis
2
HS-264 2BB high torque Servos
2
MATCC Power Window Caterpillar drive motors (Vauxhall)
3
Bags of shot for gyro weight
1
14” Lazy susan bearing for gyro
2
Bearings for the pipe connecting the trousers
1
Lots of Weld-on 16!!!! Can’t have enough!


Sunday, October 9, 2016

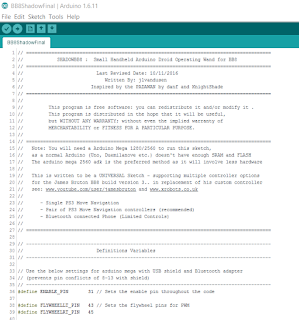
Completed Code SHADOW BB8

SHADOW BB8 discussed


Completed the migration of James Bruton's code to adapt the SHADOW code methodology...

The 4 joystick and several button system is now consolidated into 2 Move Navigation Controllers (will also write for PS3/4 joystick in the future).

Key items:

  • Navigation with the main motors (foot and gyro swing) is controlled from the right controller.
  • Head (gimble) spin is controlled from the left controller.
  • The code is broken into sub functions that are defined such as mainDrive, domeDrive, JoyStickReadings, getMPU and getPOT.  This allows future development to be completed with less issues.
  • re-assignment of pins to compensate different Arduino configurations.
  • RAW MPU rather than external interrupt based.


Combinations such as head spin and  flywheel spins are controlled by simply holding L2 on the opposite controller which tells the other controller to perform these functions.

Download the BETA code here: https://github.com/jlvandusen/SHADOWBB8

Adaption of PIN conflicts discussed

  • Using the USB SHIELD and Bluetooth V4 class 1 adapter conflicted with the PWM pins 9-13.
  • The USB SHIELD + Bluetooth adapter ran into issues where the Bluetooth would not start listening... and required a Arduino reset

Issues along the way...

I accidently burned out the GYRO motor and the motor controller...  nothing like connecting +/- to the power line feed thus generating or using both devices as a large FUSE - not a good idea.  and although no blue smoke dragon... it popped something internally.

SMAKN® Double Bts7960b 43a Motor Driver High-power Module/smart Car Driver Arduino


May they rest in peace... time for new ones!

Saturday, October 8, 2016

Drive Mechanicals: Move Controller adaption

Converting the code

After a few hours of working on cleanup and migration, was able to re-write James Bruton's code to the SHADOW code I have been using on my R2.  This code allows the use of multiple PlayStation move controllers to control various functions of the BB8 unit.

Here is a video I put up on youtube to show it...